"Old School Methods Prevail"
So I thought I'd give you a demo on
an old trick in the custom painting
arsenal that you have seen
for years. Lace paint jobs have been
around for a long time and as of late
are coming back strong in the "retro"
vintage bobber scene.
I tend to keep an eye out for sales at fabric stores or garage sales for stashes of old lace-from curtains, table cloths, or whatever. Have you ever noticed some of those cool patterns available in your girl's pantyhose stash? I'm not condoning you tear down your kitchen curtains or steal the wife's fishnet stockings, I'm just saying you can find inspiration just about anywhere you look; that's what's cool about creativity, its all around you .
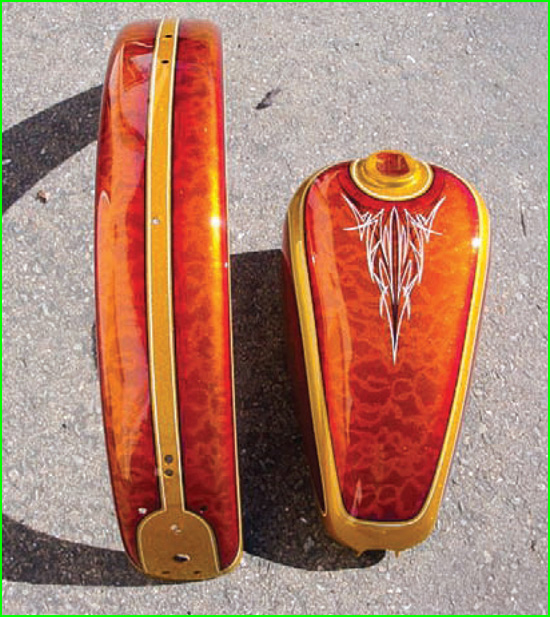
What I've done here is laid down a heavy flake base over Silver Metallic. After block sanding down all the clear coats (6-8 coats) it's ready for the Kandy Gold. You want enough clear over your flake so that you won't sand through back to raw flake. You are always better off laying your kandy down over a smooth surface because of pooling or pockets of kandy buildup, like edges on flakes that will create a "salt and pepper" effect. Most kandys require 3-5 coats to get proper coverage and depth of color. You can play with it a little to change how dark you want it.
Uniformity of color is the goal. Sometimes it's good to crosshatch your pattern to avoid ''tiger striping'' or ''banding'' because of buildup on your overlapping passes. A good rule of thumb with kandys is 75% overlap.
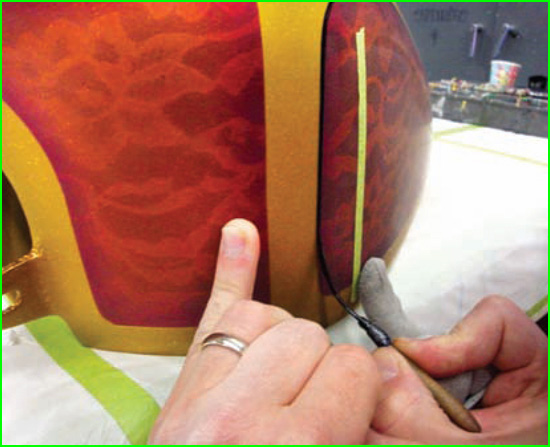
Once you are happy with your base you can start your taped panel layouts. In this case, I want to break these panels into something reminiscent of what you might see on a late '6Os or early '7Os Chopper. I think it should also be pointed out that there is no correct way to do your thing. Historically, back in the day, painters were using pearls and kandys more than flakes, The point is that there are no rules and thankfully you can press the boundaries, mild to wild Daddy-O!
From a design point of view, symmetrical panels are cool; from the artistic side, you could do asymmetrical paisley teardrops like I did on Cole Foster's CCI 40th anniversary Shovelhead chopper. Go for it!
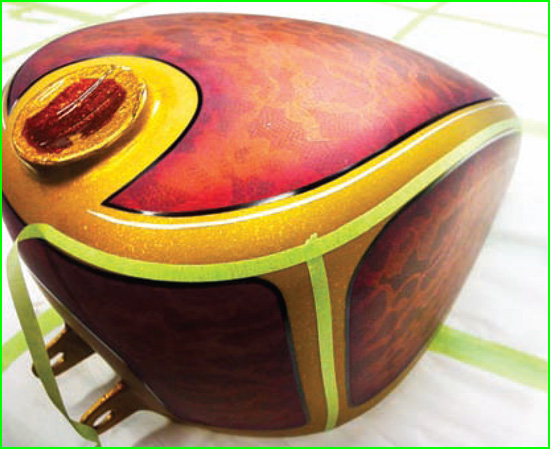
When I tape the lace down, I try to keep things lined up panel to panel. It looks better, okay? It's also important to pull it tight without distorting the image. If the lace is set up loose, the image will be softer or even fuzzy. Tight and crisp is what I'm after. Now I will mix up some Kandy Black and spray three light coats. It can be other colors, but in this case I am starting with black and then I will drop a Kandy Orange with red fades at the edge, folIowed by some clear coats.
At this point you could call it done, but I think a nice pinstripe around the panels helps to "frame" the graphic. A freehand "Dutch" style pin panel on top of the tank will give it some class. I'm thinking cream and black are the choices that come to mind.
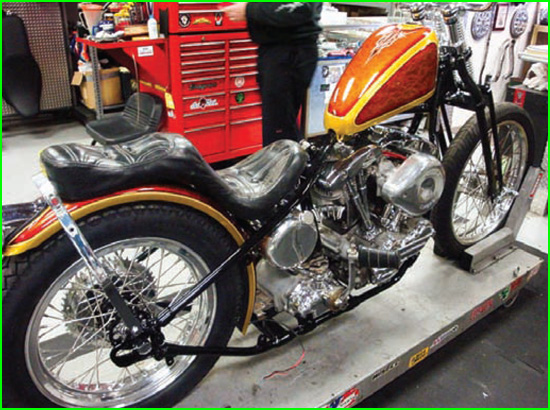
I guess it's time for some wet sanding and then it's ready for stripes. As I mentioned before, the preparation is everything! So with that in mind, we get to wet sanding with 500-grit paper so the following clear coats that go over the pinstripes stick real good, Sometimes a situation comes up where you might want to do your stripes on top of the final clear coats. That's an acceptable method, too, but I prefer to clear over the stripes for protection from gas or polishing.
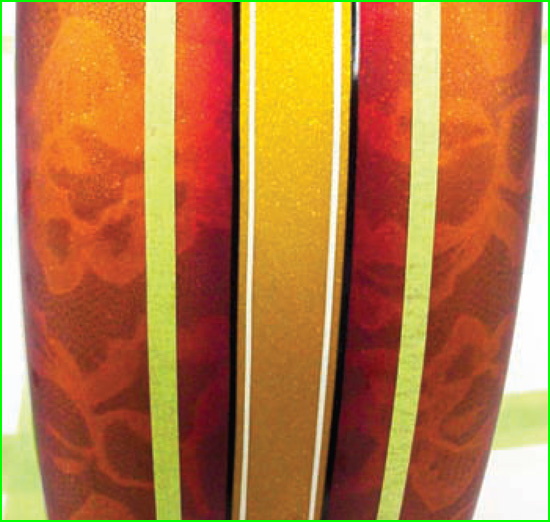
Over time an exposed pinstripe will wear off. You will notice the green tape that's laid out parallel to the panel. That's to help as a guide when laying down long straight lines, otherwise you'd be embarrassed how crooked your long straight line would get. Another little trick that some stripers like to use is "Michael Jackson's single glove" technique. Actually, the fabric the glove is made out of helps your hand slide on the surface. Your hands can get kind of sweaty or stick to the surface a little and that could make the brush jump.
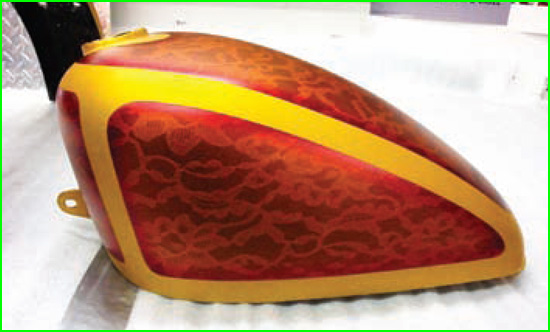
So there you have it: a nice looking, old school paint job on a Panhead Shovel Bobber. Like they did back in the day.